Velvety Smooth Homemade Truffles: Perfect for Gifting & Customization
Imagine biting into a perfectly smooth, rich, and intensely chocolatey treat that melts in your mouth, leaving behind a lingering taste of pure indulgence. What if we told you that this luxurious experience isn't reserved for high-end chocolatiers, but can be easily crafted in your own kitchen? Making homemade chocolate truffles is a surprisingly simple and deeply rewarding culinary adventure. Forget complicated techniques and obscure ingredients; this
easy chocolate truffles recipe will empower you to create gourmet-quality confections that are ideal for holiday gifting, special occasions, or simply treating yourself to a moment of decadent bliss. With just a few core ingredients and a sprinkle of creativity, you'll be rolling out exquisite truffles in no time.
Why Homemade Chocolate Truffles Are a Game-Changer
Ditching the store-bought boxes for your own homemade chocolate truffles offers a myriad of benefits beyond just the delightful taste. Firstly, there's an undeniable sense of accomplishment and pride that comes with creating something so elegant and delicious from scratch. This particular chocolate truffles recipe shines because of its elegant simplicity and the incredible results it yields. You don't need to be a pastry chef to master this art; it truly is designed for everyone.
*
Simplicity at its Best: Our core recipe relies on just three fundamental ingredients: quality chocolate, rich heavy cream, and a touch of butter. This minimalist approach ensures that the natural flavor of the chocolate truly takes center stage.
*
Unparalleled Creaminess: The magic lies in how gently these ingredients are combined. Warm cream and butter delicately melt the chocolate, forming a silky-smooth ganache that sets into an ultra-creamy, melt-in-your-mouth texture that is simply irresistible. This isn't just a treat; it's an experience.
*
Endless Customization: One of the most exciting aspects of making your own truffles is the freedom to personalize them. Whether you're aiming for a classic look with a dusting of cocoa, a festive flair with colorful sprinkles, or a sophisticated edge with crushed nuts, the possibilities are only limited by your imagination. This makes them perfect for any season or celebration.
*
Gourmet Gifting Made Easy: Homemade truffles elevate any gift box or party platter. They look sophisticated and taste divine, yet require surprisingly little effort to produce. Imagine presenting a beautifully arranged box of your own handmade truffles – it's a gift that speaks volumes about your care and thoughtfulness.
The Essential Ingredients for Perfect Chocolate Truffles
The foundation of any exceptional chocolate truffles recipe lies in the quality of its ingredients. While the list is short, selecting the right components will significantly impact the final texture and flavor of your velvety smooth treats.
*
Milk Chocolate: The Sweet Star: For a classic, universally loved truffle, milk chocolate is our hero. Its inherent sweetness and smooth melting properties create a wonderfully approachable and delicious base. We highly recommend opting for a high-quality milk chocolate chip from brands like Ghirardelli or Guittard, or even baking bars for an even more intense chocolate experience. The better the chocolate, the more sublime your truffles will be. While this recipe specifically highlights milk chocolate, don't hesitate to experiment. For those who prefer a deeper, more intense flavor profile, substituting with dark or semi-sweet chocolate works beautifully.
*
Heavy Whipping Cream: The Richness Factor: This is crucial for achieving that characteristic creamy, scoopable consistency. Heavy cream (with at least 36% milk fat) enriches the ganache, ensuring it sets perfectly without being overly hard or too soft. It's the key to that luxurious mouthfeel.
*
Unsalted Butter: For Unrivaled Smoothness and Stability: A small amount of butter goes a long way. It not only contributes to the unparalleled smoothness of the ganache but also helps stabilize the truffles, giving them a lovely, slightly firmer texture that holds its shape beautifully once chilled. For a dairy-light alternative, a high-quality coconut oil can also be used, though it might result in a slightly softer truffle.
*
Vanilla Extract (Optional, but Recommended): A dash of pure vanilla extract enhances the overall flavor profile, adding a subtle warmth and complexity that complements the chocolate beautifully.
*
A Pinch of Salt (Optional): Believe it or not, a tiny pinch of salt can heighten the chocolate flavor, balancing the sweetness and making the truffles taste even richer.
*
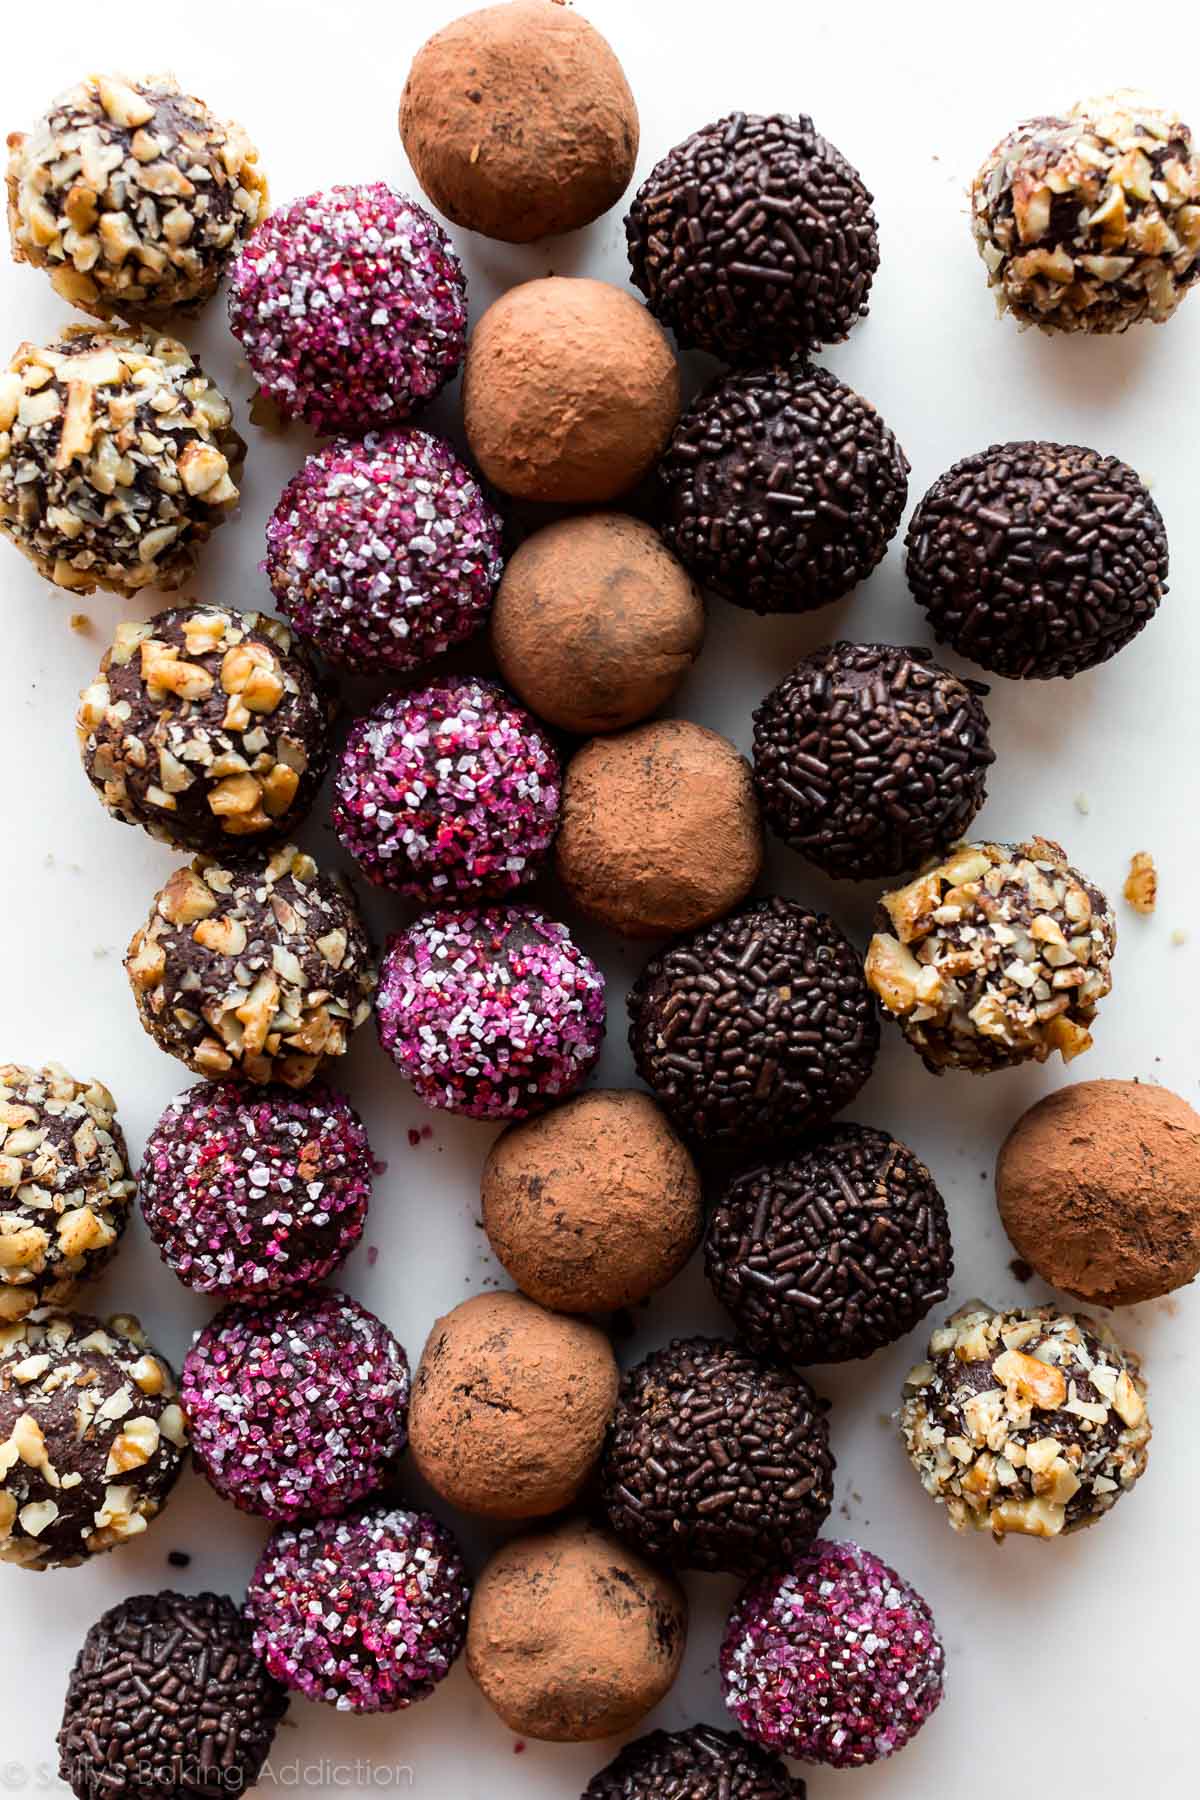
Your Choice of Coatings: The Finishing Touch: This is where the fun really begins! From classic cocoa powder to vibrant sprinkles, finely crushed nuts, powdered sugar, or even cookie crumbs, your choice of coating adds both visual appeal and an extra layer of texture and flavor.
Customization & Creative Coatings: Make Them Uniquely Yours
The true joy of this
quick & easy chocolate truffles recipe lies in its incredible adaptability. Once you have your perfectly chilled ganache balls, the world of customization opens up. This is your chance to infuse personality and theme into your treats, making them truly special for any occasion or recipient.
Think beyond the basic cocoa powder – though a rich, dark cocoa powder always creates an elegant, classic truffle. Here are some inspiring ideas to get your creative juices flowing:
*
Classic Elegance:
*
Unsweetened Cocoa Powder: For a truly authentic look and a slight bitter contrast to the sweet interior.
*
Powdered Sugar: Creates a delicate, snow-dusted appearance, especially lovely for winter holidays.
*
Finely Chopped Nuts: Toasted pecans, almonds, walnuts, or pistachios add a sophisticated crunch and earthy flavor.
*
Festive & Fun:
*
Colorful Sprinkles: Pastel sprinkles for Easter, vibrant red, green, and gold sanding sugars for Christmas, or a rainbow mix for birthdays. Sprinkles are a simple way to add instant cheer.
*
Crushed Candy Canes: A minty crunch perfect for the festive season.
*
Mini Chocolate Chips: For an extra boost of chocolate texture.
*
Crushed Cookies: Think Oreo crumbs for a cookies-and-cream truffle, or graham cracker crumbs for a s'mores-inspired treat.
*
Fruity & Exotic:
*
Freeze-Dried Fruit Powder: Raspberry, strawberry, or blueberry powders add a tart, vibrant burst of color and flavor.
*
Shredded Coconut: Toasted or untoasted, for a tropical twist.
*
Boozy Infusions (for adult palates):
* A splash of liqueur (e.g., Kahlúa, Grand Marnier, Bailey's Irish Cream) can be stirred into the ganache after it's removed from the heat, adding another layer of sophisticated flavor.
When experimenting with coatings, ensure they are finely crushed or small enough to adhere well to the slightly sticky surface of the truffles. You can even create an assortment of different coatings to offer a diverse and visually appealing selection, making your truffle platter truly unforgettable.
Crafting Your Velvety Truffles: A Step-by-Step Guide
Making these homemade chocolate truffles is a straightforward process, broken down into a few simple stages. Precision and patience are your best friends here, especially when allowing the ganache to chill properly.
1.
Prepare the Ganache Base: Begin by bringing your heavy cream to a gentle simmer in a saucepan over medium heat. You want to see small bubbles forming around the edges, but avoid a rolling boil. Once simmering, remove it from the heat immediately. Stir in your chosen milk chocolate chips or finely chopped chocolate, butter, and a tiny pinch of salt (if using). Allow the hot cream to sit over the chocolate mixture for a few minutes, letting the residual heat work its magic. Then, gently stir everything together until the chocolate and butter are completely melted and the mixture is silky smooth and glossy. If adding vanilla extract or a liqueur, stir it in now.
2.
Chill to Perfection: Pour the warm ganache into a shallow dish or an airtight container. A shallow dish helps it cool more evenly and quickly. Cover the dish with plastic wrap, pressing it directly onto the surface of the ganache to prevent a skin from forming. Transfer the dish to the refrigerator and chill for at least 2-4 hours, or until the ganache is firm enough to scoop and roll. Depending on your refrigerator's temperature and the depth of your dish, this could take longer. The ganache should be firm but still pliable.
3.
Scoop and Roll: Once thoroughly chilled, remove the ganache from the fridge. Using a small cookie scoop, a melon baller, or simply two spoons, scoop out uniform portions of the mixture. Gently roll each portion between your palms to form smooth, round balls. This step can get a bit messy, and the warmth of your hands can soften the ganache. If the mixture becomes too soft to work with, simply pop it back into the fridge for 5-10 minutes to firm up again before continuing. Working in small batches can also help manage this. For beautifully uniform truffles, try to make each ball roughly the same size.
4.
Coat and Customize: Spread your chosen coatings (cocoa powder, sprinkles, nuts, etc.) in separate shallow dishes. Roll each truffle thoroughly in your desired coating until it's evenly covered. Don't be shy – a generous coating not only adds flavor and texture but also helps prevent the truffles from sticking together.
5.
Final Chill and Serve: Arrange your coated truffles on a parchment-lined baking sheet or plate. Return them to the refrigerator for another 15-30 minutes to fully set and firm up the coatings. Once chilled, they are ready to be enjoyed or packaged for gifting!
Expert Tips for Truffle Perfection
*
Quality Chocolate Matters: We can't stress this enough. While chocolate chips work, using a high-quality baking bar will yield a more profound and complex chocolate flavor. Think of it as investing in the soul of your truffle.
*
Temperature Control: When heating the cream, avoid boiling, as this can scorch the cream and affect the ganache's texture. Similarly, ensure the ganache is properly chilled before rolling; otherwise, you'll have a sticky, unmanageable mess.
*
Work Clean and Efficiently: Have all your coatings ready before you start rolling. Keep a bowl of warm water and a towel nearby to quickly clean your hands between batches, especially if the ganache starts to get sticky.
*
Even Rolling: To achieve those perfectly round, gourmet-looking truffles, take your time rolling. Gentle, consistent pressure is key. If your hands are too warm, briefly rinse them in cold water and dry thoroughly.
*
Storage: Homemade truffles are best stored in an airtight container in the refrigerator. They will last for up to 2 weeks, though honestly, they rarely last that long! Allow them to come to room temperature for about 10-15 minutes before serving for the best flavor and texture.
Conclusion
Creating velvety smooth homemade truffles is an incredibly satisfying experience that transforms simple ingredients into an extraordinary treat. This chocolate truffles recipe proves that gourmet indulgence doesn't have to be complicated or intimidating. With minimal effort, you can produce stunning, customizable confections perfect for impressing guests, delighting loved ones with a thoughtful gift, or simply savoring a moment of pure chocolate bliss. So, gather your ingredients, unleash your creativity with a myriad of coatings, and prepare to embark on a delicious journey into the world of homemade chocolate truffles. Your taste buds, and anyone lucky enough to receive them, will thank you!